Showing posts with label Tips and Tricks. Show all posts

Monday, June 4, 2012

How to quickly delete Facebook Messages [Chrome]


Image Credit: Facebook Fast messages delete

The message of this Chrome extension is very simple. Deleting messages people send you on Facebook is quiet a tiresome and cumbersome process. You need to first login to Facebook, access your messages and then click the small (x) mark that appears when you hover over the end of the message. Once you click the (X) mark the message is archived. To actually delete the message you need to click on it, open it and then under actions choose 'Delete Messages' all very time consuming. On Facebook who wants to take so much time just to clean one's inbox. Facebook Fast Delete Messages is a Chrome Extension that will do this for you.


Facebook Fast Delete Messages: How does it work
1. Go to the extension using your Chrome Browser
2. Click the app to chrome button
3. Login to Facebook now if your already logged in, logout and log back in again and it should work
4. when you go to your messages inbox there is now a red (x) mark beside Facebook's blue one.
5. Clicking the red mark will delete the message in one step only


Have fun and this extension sure makes deleting Facebook messages that much easier and a lot less time consuming. 
Facebook Fast Delete Messages


An original post by

Sociolatte


How to Turn off, disable or stop Socialcam sharing on Facebook


Socialcam on Facebook is slowly turning into a social scare. The app automatically shares all the videos you or your friends watch on your Facebook. Whcih means that it will be available in your friend's news feeds and some of these videos have questionable titles. It can give people who watch a video for fun a pretty mean scare when they find out that all the videos they have watched on the App have been shared with all of their friends on Facebook. In addition you might find that there videos are also on your Timeline. This is Socialcam trying to get a lot of Facebook juice. Videos are popular and everyone likes watching videos, Socialcam has been getting a lot of hits and traffic from Facebook with their social share feature. There is a quick and easy way or workaround to make sure that videos you watch using Socialcam are not shared on all your friend's news feeds.


How to stop or disable  Socialcam from sharing videos on Facebook


1. The first method is when you see a friends Socialcam feed and you also want to watch the video. You can search for the same on Google and watch it. Thereby avoiding the social sharing aspect. However if you want to watch it right there on Facebook, you can click on the app and it will ask you for permission.


When you signup the app will ask "Who can see posts this app makes for you on your Timeline'. Below which you will need to choose 'Only me'. Once you choose this option only you can see videos you watched and it will be hidden from all your friends on Facebook. 


2. The second method is if you have already added the app the Facebook and want to stop it from sharing videos you watch.


Login to Facebook
Click on down-arrow beside home
Choose privacy settings
Beside Ads, Apps and Websites click on edit
Click on edit settings
Find Socialcam and click on it
Beside Posts on your behalf: Who can see posts this app makes for you on your Facebook timeline?
Choose 'Only Me'
Click the (x) mark beside " Posts on your behalf'
Click close and you'r done.


Note: If you do not use this app and also do not want to see all those videos appearing on your news feed. All you need to do is to hover over any of these videos and then click the (x) mark that appears and then choose 'hide all from Socialcam'


An original post by

Sociolatte


Wednesday, May 30, 2012

How to find your Facebook email address


This is a simple trick on how to find your Facebook email Address or Facebook mail ID. This post is not going to redirect you anywhere or tell you where to go to find out what your Facebook email ID really is. It is very simple your public username is your Facebook email address. So let's say your Facebook username is user.123, your Facebook public address would be www.Facebook.com/user.123. Your Facebook email address would automatically then be user.123@ Facebook.com. So all you need to do is to click on your Facebook Timeline and check the URL in the address bar. You full Facebook address will appear and whatever appears after Facebook.com is your Facebook email address.

How to find your Facebook Email Address


Maybe you have not yet chosen a vanity URL for your profile. This means you can have your name after .com. You can set it right and change everything because the default profile URL you are given does not look nice and you should change it to something more colorful and nice. So, to customize your Facebook email address go here and choose a new one. You can now start giving out your new Facebook email address to all your friends and they can then send you email direct to your Facebook account. You can then reply from there and use it like traditional email. Please leave a comment below to continue this discussion. 


Tuesday, May 15, 2012

Chrome: Perform a Google Image search on any Pinterest image


Image Credit: Pin Search

Pinterest has lost no interest in terms of the number of people who spend time on the service gazing dreamily at photos, images and pictures and who continue to do the same for quiet some time. Anyways there is a Chrome App if you would like to dig even deeper and find out more. Many people would want that, as the wealth of information available when you do a Google search on a photo. With this Chrome App called 'Pin Search' you can add the power of Google search to those pictures and find out more information related to the image. Like who took the photograph, websites the same image appears on, location and if it a fairly well know photo then the date and time. A very useful app for people who spend a lot of time on Pinterest and would like to find out a little more about images and photos they come across.


Pin Search: How does it work


1. Add the extension to your Chrome 

2. Now whenever you are on Pinterest and you hover over a photo, you get a pop-up like search button. Click it and perform your Google search. The best part is that the search option only appears when you hover over an image.


An original post by

Sociolatte


Monday, May 14, 2012

Use Google Image search to quickly find related information and photos


Google image search can be quiet powerful and deliver a wealth of information regarding photos you might want to research. Sometime when you go to Google image search and type in your search for a specific image. You might not really get what your looking for. If you however have one photo on your PC or Mobile Device this could be quiet helpful. If you use the same picture in Google's image search you can find related photos from the same batch. Information about where that photo was taken and the image size. You can then further drill down to other photos from that collection. If you do not know who is in the picture or the place it was taken out in. Google will deliver all this information if the photos has been fairly popular on the internet. If the photo is not popular, you can at least find the site where the photo might be hosted.


How to use Google image search with a photograph.


1. Go to Google.com
2. Click on image search. You can choose your search options like safe search on or off.
3. Click on the small photo icon found at the end of the search bar and then upload the photo to Google search.
4. You will now get basic answers like size of the photo, location it was taken in and other related photos. Google will also try to guess whose face is in the picture. 


This will definitely help you if you are researching a specific photo and would like to find related information and other photos from the same batch. You can also find out on how many other sites the photo appears. Who is the designer, author or chef photographer of the image. Please leave your feedback in the comments section below. 


An original post by

Sociolatte


Friday, April 6, 2012

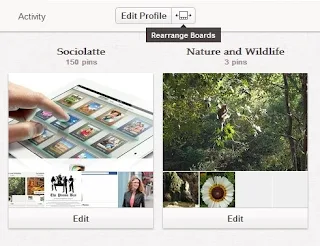
How to rearrange Pinterest Boards


This is a quick guide on how to rearrange Pinterest Boards also known as pinboards on Pinterest. This is especially important if you have a number of boards. Some people I follow have more than 30 boards and in fact this is not an uncommon thing, there are lots an lots of users who have a whole number of boards on Pinterest and with this option you can choose to show your boards in the order you want. With the ones you want to showcase the most appearing on top of your board order. 

Can I rearrange the order of pins on a board?
The answer is no but the team at Pinterest have said they are working on this. 


To rearrange your boards on Pinterest you would need to:
1. login to Pinterest
2.  Click on your name
3. Choose 'Your Boards'
4. All your boards are now displayed
5. Drag and Drop boards
7. You can rearrange your boards in any order your choose.


Rearranging boards on Pinterest as as simple as Click on any board - keep pressing down while you drag the board to the place your want to put it. Release your hold and the board stays there.

Thursday, April 5, 2012

Video: 17 tips and tricks for the iPad


This is a simple but really helpful video for mastering your iPad, there are some cool tips and tricks you might not have known. If you have had an iPad for sometime then you might already know these tips and tricks. This is especially good for those of you who have just got the 'New iPad'. The video covers a whole lot of helpful tips like how to take screenshots, creating a slideshow, how to erase all data, set a complex password, creating custom shortcuts, multi-touch gestures, punction shortcuts and music player. One of the ways to undo paste is to shake and undo. If you iPad is shared among family members then you can limit the content they can access by enabling restrictions. This way when someone else has access to your iPad you can limit the number of apps they will be able to access when using it. if you're looking for the best apps with the all new retina display you can check out our other post here


An original post by

Sociolatte


Monday, March 19, 2012

How to change Gmail's new button labels to text or icons


With Gmail's new look comes all the text buttons converted to buttons with logos. This might seem a bit confusing to some people just for the simple fact that we are used to the old text labels. So if you are one of those people who would rather have text bales rather that button labels help is at hand. In fact those text buttons used to be permanent fixtures but now only when you click on the text box do the options on top appear. Every Gmail user is familiar with those buttons - Archive, Spam , Delete, Move to, Labels and More. Users of email usually become very familiar with their Inbox layout and can usually do their usual tasks with their eyes closed. When there is a change it always takes a little time to adjust and get bacl to normal. So if you have become comfortable with the old text labels in Gamil, here is how to get them back.


How to change and toggle between text and button labels in Gmail
1. Login to Gmail
2. Click on the cog icon
3. Choose settings
4. Scroll down and beside 'Button Labels' choose between Icons and Text
5. You're done


This way you can toggle back and forth and choose the view your labels in Gmail either as Text or Icons.


An original post by

Sociolatte


Friday, February 24, 2012

Change relationship status on Facebook without people knowing


If you are going through a break-up and would like to keep things a little private on Facebook. You can do so in a few steps. Many users like to broadcast their new found love on FB but then things go a little sour and break-ups can become quiet public on Facebook. Especially when you change your status from 'In a relationship', 'Married' or 'Engaged' to 'Single'. All this does not have to happen in front of all your friends and if you are not careful to same goes to all your friends 'news feed'. So if you would like to keep things private and change your status without having your relationship status broadcasted to all your fiends pages, follow the steps below to safely change your status and not let you friends know.

Change relationship status on Facebook without people knowing

How to change relationship status on Facebook without people knowing. 

Steps to follow
1. On Timeline click on About
2. Beside basic info click on edit
3. Beside relationship status choose single or whichever status you desire.
4. Click the Globe icon and from the drop-down choose 'Only Me'. Now only you can view your relationship status'
5. Click Save

Next
1. Beside your 'Relationship Box' click the edit icon
2. Click the globe icon and from the drop-down choose 'Only Me'.
3. Click save and your relationship status will disappear. This way your relationship status stays private and confidential.

What to do if you have already broadcasted your relationship status on Facebook Timeline and want to cancel it. 
1. On your Facebook Timeline click on Activity log and from there find the status and beside the globe icon click on the circle icon. From there choose 'Hide from Timeline'. This will remove your relationship status update from your Timeline and remove it from your friends news feed. Now your free. Please leave a comment with what you think.


Wednesday, February 15, 2012

Video: Google Search Tips and Tricks


One of the other helpful things Google released on Valentine's day is a small but neat video which offers a lot of helpful tips and tricks on How to search Google and make it more useful. You know how the first thing many users do is login to Google first thing in the morning. Well, if you are one of those people, this video will help you to become better at search and help you appear much more of a genius than you already are. Google's algorithm has been optimized to bring you the best of the web. You can now use it to make you life much more easier and actually use it to appear really smart. A useful example, one of my friends working in HR was given a quiz to complete and there was also a reward attached. Googling one of the questions brought up the entire test with all the answers. Google is a storehouse packed with useful information. To get the most out of it though you need the power of search. A few useful tips and tricks can help you go a long way. Check the video out below and hope you find some tips that you might have overlooked till now. 


An original post by

Sociolatte


Monday, February 6, 2012

QRHacker lets you create personalized QR codes by adding colors, images and logos


QRHacker is a fun QR code generator, using this web app you can personalize your QR codes and have fun. You can even pay around with the colors and embed images into your QR code. When you first start generating your code you can choose to add some text, link to a URL, phone number and Vcard. Once you have done that it is time to get started. Forget black and white QR codes that look like a maze of jumbled parts. These QR codes can be fun, you can add your Logo or embed an image into the code and generate a QR code your for App, Website, Product or blog that looks totally different. Developed by  a small Hungarian-based team called Carnation Group


Once you fill in all the details you can then start adding colors to your QR code and you can even edit the same pixel by pixel, You can also edit each pixel individually. You can add background and foreground colors and upload an image to embed or add your logo. Once completed you have a nice colorful and creative QR code which you can use. Please check the image to get a better idea.
QRHacker


An original post by

Sociolatte


Wednesday, February 1, 2012

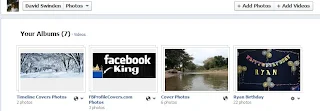
Move photos to a different album on Facebook


This post is in response to a question by one of our users. can I move photos from one album to another without having to upload them all over again?. The answer is yes, it is very easy to move photos between albums on Facebook without having to upload them once again. This can be done on the new Facebook Timeline by accessing your photos link on Timeline. It will also be good to remember that this works only with albums you have created and not for albums that have been complied automatically. Compiled automatically will mean those albums that are created automatically by Facebook like Profile Pictures, Mobile Uploads and Wall Photos Albums. These are albums that get created automatically from photos you upload randomly to your Timeline.


Move photos to a different album on Facebook


How to move photos to a different album on Facebook


1. Click on the photos link on your Timeline or profile and choose an existing album
2. Click on Edit Album found on the top of the page above the photos
3. Click or select Edit Photos found in the bottom left corner
Note: With the new settings you will have to move your photos around. Move to different placeholders or just drag-and-drop till the move options pops-up.
4. Select a new album from the drop-down menu found under each photo you wish to move.
5. Select the album you wish to move to found under each photos
6. Click Save Changes to move the selected photos
7. You're done


Note: You cannot move to albums that have been compiled automatically by Facebook. So the Facebook Timeline Covers album will not be available in the drop-down menu. You can move any photo to an Album you've created.

Please check video below for details
http://youtu.be/u4yAkSZM1GY


Tuesday, January 31, 2012

How to delete a post on someone else's Facebook Timeline


Now that you have begun to cleanup your Timeline and make sure it is ready for public viewing, this is if you have just got Timeline as your new profile. If you have had Timeline for sometime and have been busy deleting posts and adjusting your Timeline. You might now want to check what you have posted on other people's profiles that is now showing up on your friends' Timelines. This will include all your posts, pics, images and videos. There is an option for you to quickly find all your posts and see all your posts that you have posted on other people's wall that is now showing up on their Timelines. The instructions below will help you on, how to delete a post on someone else's Facebook Timeline.


How to remove or delete your posts from other people's Timelines. (Including likes, events and other posts)
1. Login to Facebook
2. Click on your name to bring up your Timeline
3. Click on activity log
4. Click on 'All' found on the top right-hand corner
5. Choose 'Your Posts', this will bring up all your posts found all over Fb.
6. Find the post you want to delete and remove it, you cannot hide it as it is found on someone elses' Timeline. You will have to delete.
7. Once your satisfied you're done.

Facebook Timeline: Control who can view your Timeline and make it private


If you are worried that your new FB profile, now known as Timeline is visible to everyone under the 'Public' settings on Facebook, you can change that now. There is a Global setting reserved for who can view your Facebook Timeline and there are three options available. You can choose between 'Everyone', 'Friends' and Friends of friends'. The implications of this setting would be you can set your Facebook Timeline to private and ensure that only your FB friends are able to view your Timeline. If you do not want everyone who visits your profile to view your Timeline you can limit the audience of your Timeline. 


How to adjust your Facebook Timeline visibility settings
1. Login to Facebook
2. Click on the down arrow next to the home button
3. Choose privacy settings
4. Beside 'how you connect' click on 'Edit Settings'
5. Beside 'who can look up your Timeline by name or contact info' click on 'everyone'
6. Now you can choose between 'Everyone, Friends or friends of friends'. Choosing everyone would mean anyone on Facebook or people who find your profile through search engines will be able to view your Timeline, if you choose friends then only your pals can view your Timeline. Friends of friends means people who are friends of your pals can also view your Timeline
7. Choose your privacy option
8. Click done and you're done.


An original post by

Sociolatte


Monday, January 30, 2012

How to see who has unfriended you on Facebook


Source: Hello-kitty.tumblr

If you want to know who has unfriended you on Facebook there is a browser plug-in for that. Known as Unfreind finder this cleaver app goes through your friends list and shows you who has ditched you and gone on with their lives. Without the plug-in the only way to do this is to keep a close eye on all your pals and when your friend count goes down, figure out who is missing. This workaround or shortcut however makes things a little easier. Now not everyone wants to know who unfriends them on Facebook, if there you have found this page it must mean you want to know and keep a track on all those people who decide to leave you and walk away on Facebook. This cleaver app will also let you know if you have been removed or you friend has actually left Facebook and deactivated their account.


Unfriend Finder: How does it work

It is compatible with FireFox, Chrome, Opera, Safari and Internet Explorer

To use it on FireFox you will first need to install the greasemonkey script, help can be found here

To install it in Chrome all you need to do is to click on install and it is automatic.

Once installed, you'll see two new features appear in Facebook. There will be an "Unfriends" tab on the top-right of your screen and an "Unfriends" option in your "Favorites" list. When someone unfriends you, a red number notification will appear above the "Unfriends" tab. Unfriend info also appears in your notifications tab. 


An original post by

Sociolatte


Control who can see my friends list on Facebook Timeline


Facebook Timeline has a feature that is very similar to the one found on LinkedIn. You can adjust your friends list privacy settings and decide who gets to see your list of friends. There are many reasons you might want to do this on Facebook. Many teens have been leaving Facebook and heading to Twitter citing privacy concerns. Now that their parents, uncles, aunts and grandparents have been sending them friend requests. Their space has slowing been slipping away online. Not to worry, the new Timeline does have some good to it and one of them is the ability to hide your friends list from certain people, or make it public and available to everyone or just visible to your friends. You can also make it visible to once certain lists you have like your business list or close friends list, you get to decide and choose.


How to Control who can see my friends list on Facebook Timeline and adjust full friends list privacy settings
1. Login to Facebook
2. Click on your name to bring up your new profile also known as Timeline
3. Click on your list of friends
4. Click on the pencil icon titled 'edit'
5. Click on the Globe Icon
6. You can now choose between public, friends, only me, custom or certain lists only. If you choose custom you can make your friends list visible to certain people or hide it from certain people)
7. Once you make a choice you're done.


Please leave a comment with what you think.

Saturday, January 28, 2012

How to compare the size of SmartPhones before you buy


There is a wide range of SmartPhones available today for you in the market. Each phone comes with its unique screen-size and features. Some phones have bigger and wider screens and different resolutions. Some are clearer that the other. There are a whole lot of phones out there. So how do you check the actual size of each phone before going to a retail store and holding it in your hands. Versusio is a web app that helps you do just that. Once you compare once phone against the other you might still want to get a realistic feel of how big the phone would actually be if you were holding it in your hands.


 There is a link called 'Show original size', clicking this link will put an American express credit card in between both phones and you can adjust till you get the real-life size. In addition to giving you a look and feel of the phone size the web app also gives you the pro and cons of each smartphone. So you can compare the Samsung Galaxy Note against the iPhone 4S 64GB or LG Optimus 3D P920 vs. Motorola DROID RAZR, RIM BlackBerry Bold Touch 9900 vs. Nokia Lumia 800, Motorola Defy Plus vs. Sony Ericsson Xperia active,  Nokia Asha 303 vs. Samsung Galaxy ACE S5830, HTC EVO 3D vs. Nokia Lumia 800, Samsung Galaxy S II I9100 vs. Apple iPhone 4 16GB and HTC Desire vs. HTC EVO 3D. Each of these comparisons also show you the reasons that one phone might be better that the other and highlights the features that are noteworthy about each phone. 
Versusio


An original post by

Sociolatte


Tuesday, January 24, 2012

Facebook Timeline Guide


Image Credit: Facebook

Facebook launched Timeline last year with the option for users to try it out, test it for 7 days before it goes live on their profiles. Over the next week whether you are ready or not it is coming to you, once you see the announcement on top of your homepage, you will have 7 days to check it out and delete or remove or add stories to your Timeline. This is going to take many uses by surprise and the rush is going to be on as to how on earth do you get it ready before friends can see your Timeline.


We have a few guides to help you get started and we have them listed below. If you require further guides and lists do let us know in the comment section below.

1. How to delete old posts on Facebook Timeline

2. How to limit the audience of past posts on your Timeline

3. How to upload videos to your Timeline

4. How to add apps to your Timeline 


5. How to get Facebook Timeline right now
6. Difference between delete and hide post on Timeline
7. How to set your full friends list privacy settings
8. How to make sure your Timeline can be viewed only by friends and set it to private. 


A lot of the adjustments you will make will be through the activity log

1. What is the activity log and how does it work? 

2. how to allow, feature or hide posts on Timeline using the activity log. 


Blog Post by Facebook announcing the Timeline now being available globally can be found here


Facebook Timeline: How to videos


Move photos between albums


An original post by

Sociolatte


Tuesday, January 10, 2012

Extract images from Word, Excel, PowerPoint or eBooks


There are a lot of apps out there that help you to extract images from Office documents and eBooks. This free to download and use app, lets you extract images from all Office Docs, eBooks and now Apple iWorks. There are many reasons why you might want to save images you find interesting on documents that you download from the web. Some of them are stunning and some have Tech imagery that you might want to study later. This freeware App is useful as it is able to extract images in a few simple steps and save it to your computer/hard drive. The images are stored in their  original formats and hence no loss of picture quality.


Trying to extract images from Office documents can be laborious and might result in the loss of picture quality. Hence this app - Office Image Extraction Wizard supports over 40 common file formats and offers you the choice of storing the extracted images into a folder you specify. Some of the formats supports apart from Word, Excel and PowerPoint are Apple iworks (.pages) and eBooks (.pub). Office does not need to be installed for this app to run. 
Office Image Extraction Wizard


An original post by

Sociolatte


Saturday, January 7, 2012

How to skip through YouTube videos using the number keys


This is a simple trick that can be done easily with many benefits to it. For starters if you want to save bandwidth and watch only the important part of a videos this trick works really well. If you want to just skip through a video and see if it is really interesting then this will work for you. There maybe many others reasons not covered here but the functionality is great and will help you to skip through videos and gauge if the video is really worth the time you are going to spend watching it.


How to skip through YouTube videos.
1. Start a YouTube video
2. With your mouse click inside the video. You know when you click on a video inside the player, it pauses it.
3. Now you can use your number keys to skip through the video. if you click 3 it goes to 30% and the same thing goes for numbers 1-9. So if you click 8 it goes to 80% of the video


That's it, this is just s simple trick to help you browse through videos and checking them out without having to spend you time watching the whole video. If you are an avid YouTube user you know there is this popular comment 'This video was not worth the last 2 minutes of my life'. This and many similar comments are something all YouTube users are familiar with. Use this trick for fast and easy viewing. 


An original post by

Sociolatte